When sending out an invitation via email, there are two choices: Single-Use Link or Multi-Use Link. Depending on your goals and participants, each method has its benefits. Make your choice, then prepare and publish!
Navigate to
Learn more about best practices in email delivery.
Single-Use Link
Sending an invitation with a Single-Use Link is an excellent choice of distribution method to collect a single response from each participant. A few benefits of Single-Use Links are:
- Track individual participation
- Send Reminders to non-participants
- Use Data Population (Pre-population)
- Prevent multiple/duplicate participation (ballot box stuffing)
A few points to remember when using Single-Use Links:
- Each Single-Use Link only allows a single response
- Single-Use Links should not be sent to group email addresses
- These invitations should not be forwarded
Multi-Use Link
Sending an invitation with a Multi-Use Link is a smart distribution method to widen your audience. A few benefits of Multi-Use Links are:
- Allow participants to forward invitations
- Allow participants to respond multiple times
- Broaden participation beyond existing contact list
- Track individual responses
- Send Intelligent Reminders to non-participants
- Use Data Population
- Restrict number of responses from each invitee
A few points to remember when using Multi-Use Links:
- Multiple/duplicate participation (ballot box stuffing) cannot be prevented.
- Each invitee will have different links that can be used multiple times.
Send Email Invitations
Here’s how you can send an email invitation:
- Select your project, then click on the Publish icon.
- Select Email from the Email/SMS menu on the Publish page.
- In Select Email Message, review the Email Messages created under Email Templates.
Once sent/scheduled, the email message cannot be changed.
- Hover over your chosen template, then choose from the following options:
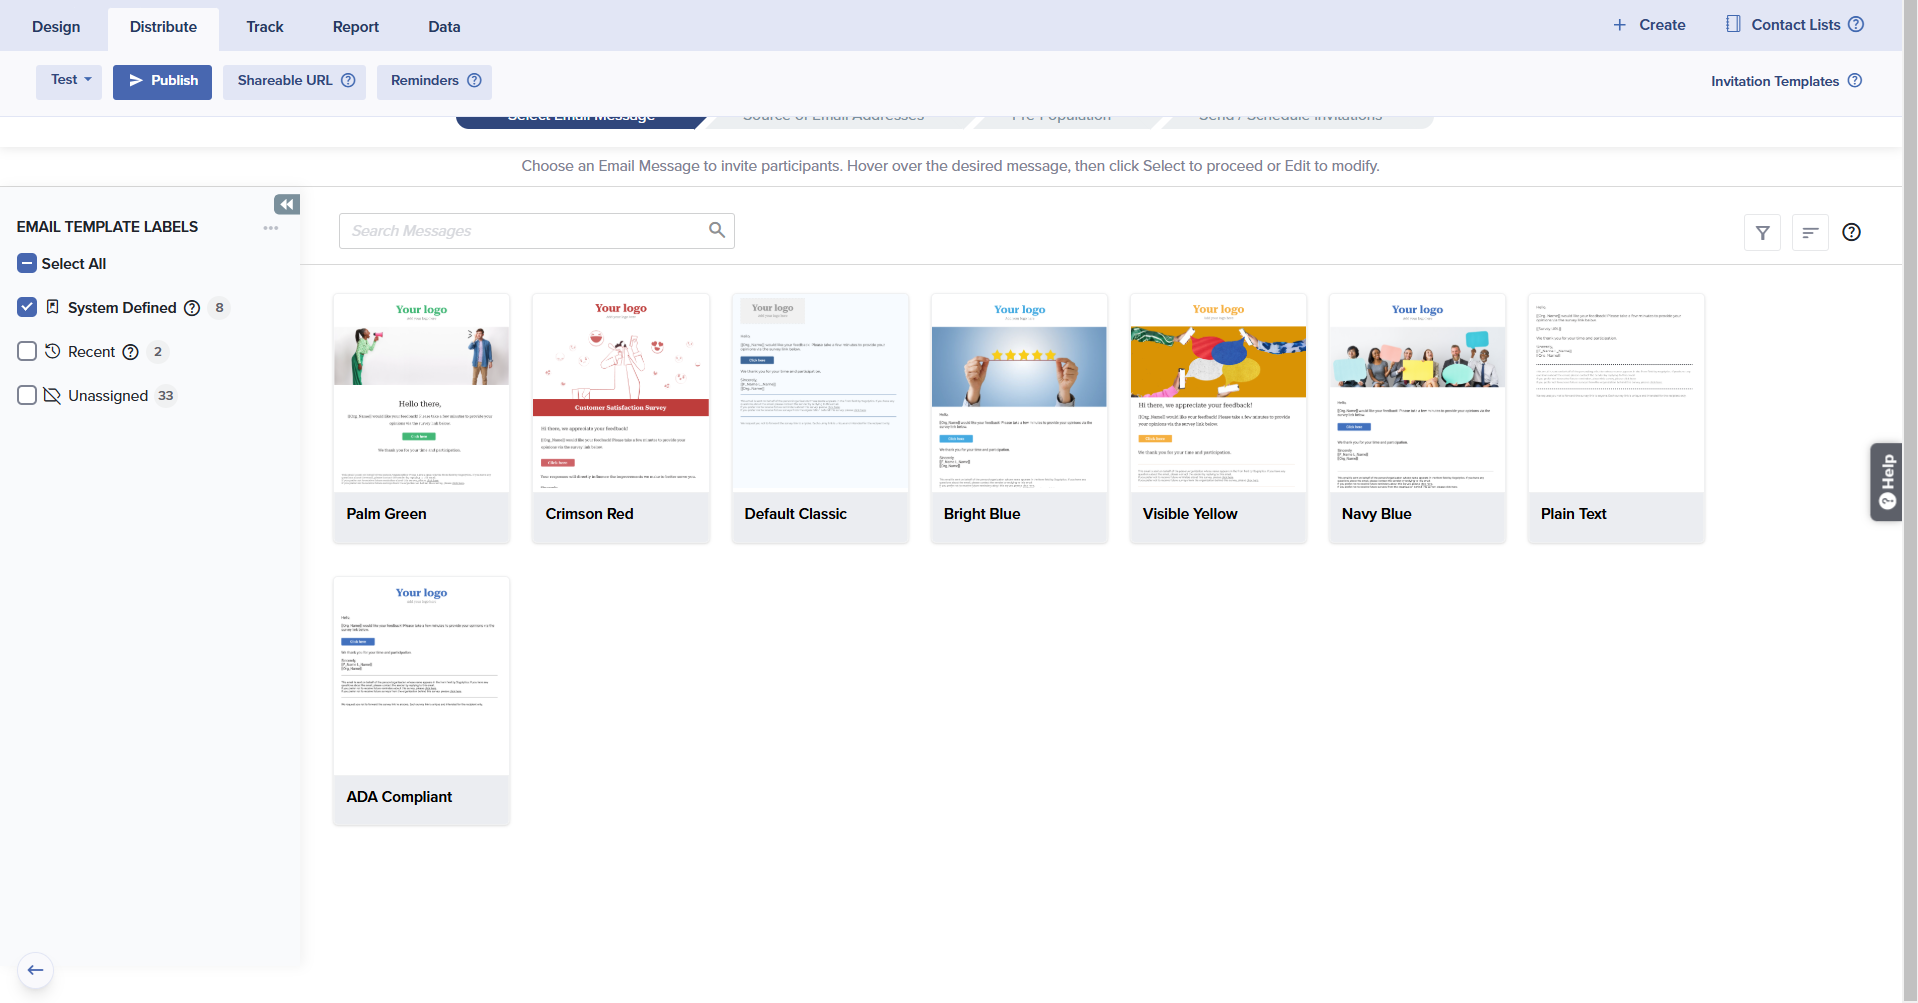
- Select: Choose a template and proceed to publishing
- Edit: Review and edit a message before publishing
- Preview: Preview a message to confirm your choice
- If you’ve chosen to edit, complete and save any changes before continuing. You can also embed a question from the project by enabling Embed a Question from the menu on the left and selecting the question you want to embed. Learn more about how to embed a question in your email message.
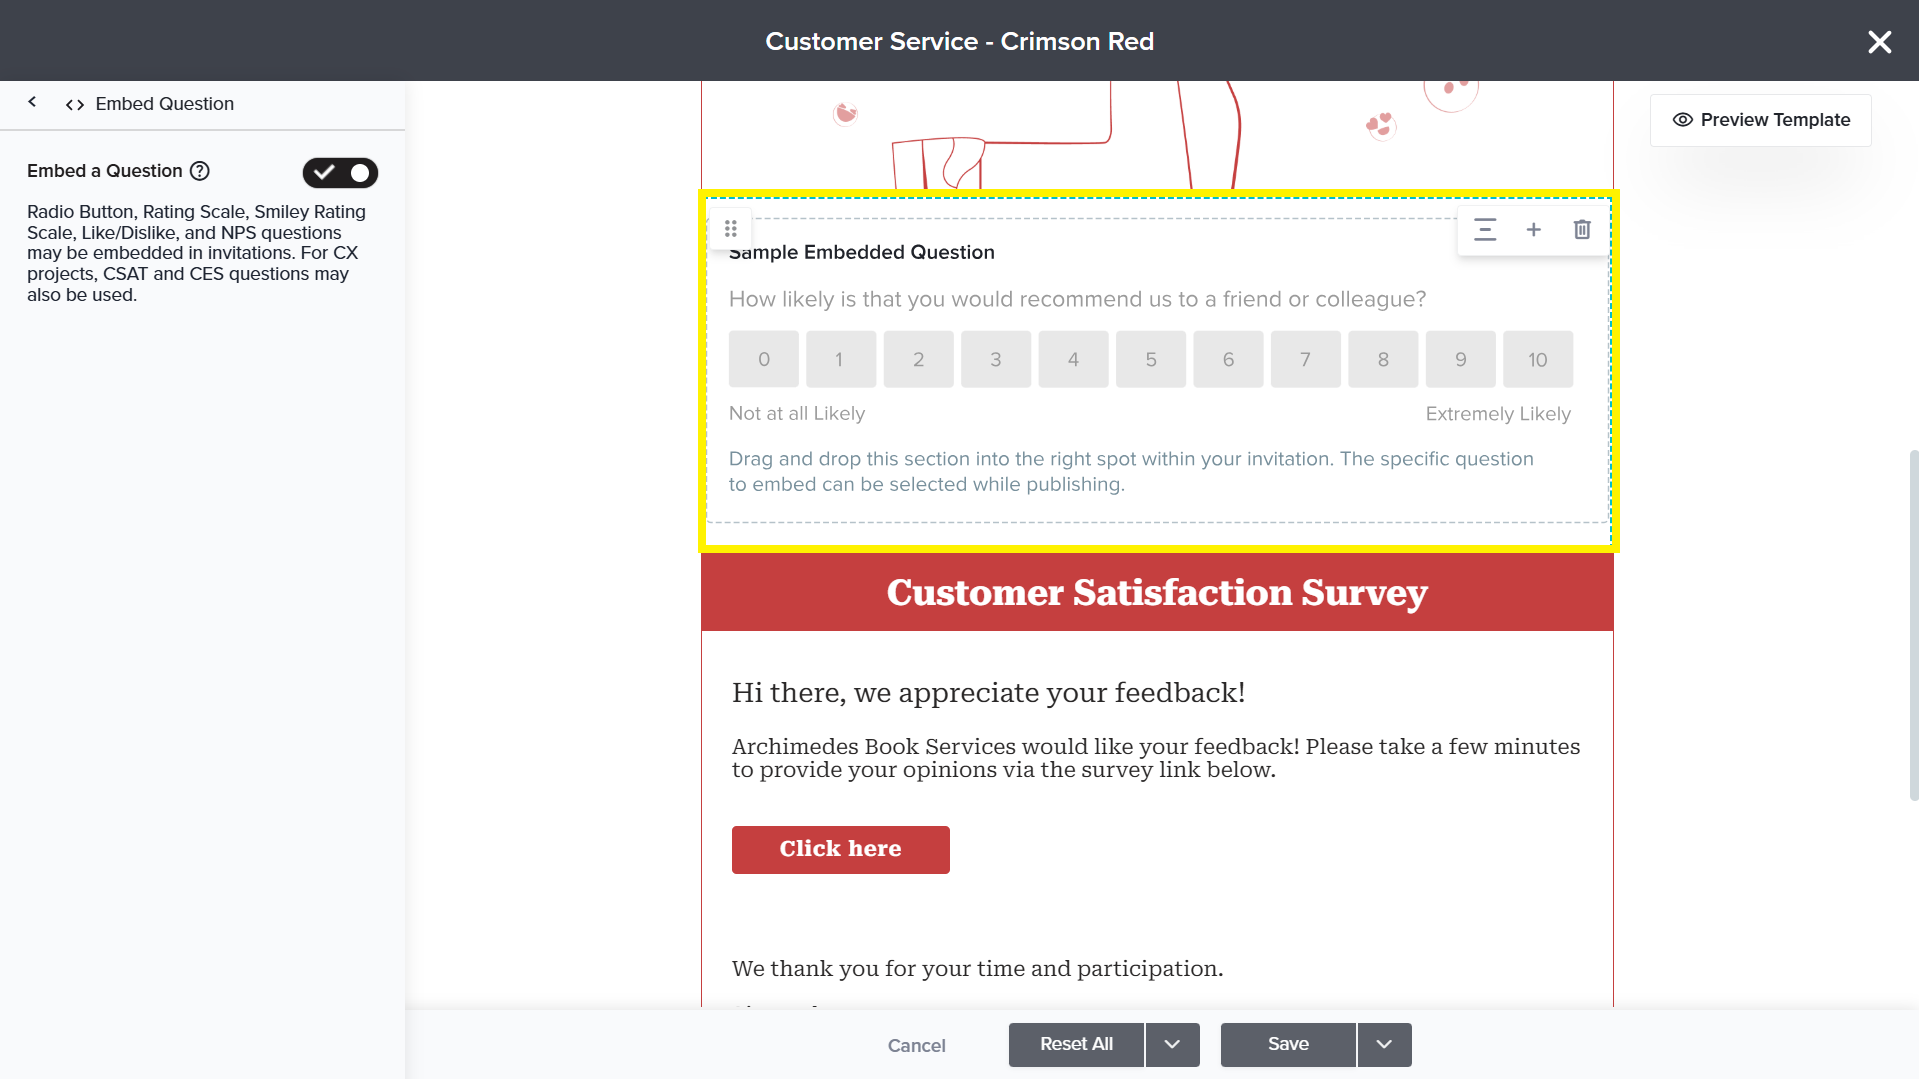
Only Radio Button, Rating Scale, Smiley Rating Scale, Like/Dislike, and NPS questions can be embedded in invitations. Additionally, in CX project invitations, CSAT and CES questions can also be embedded.
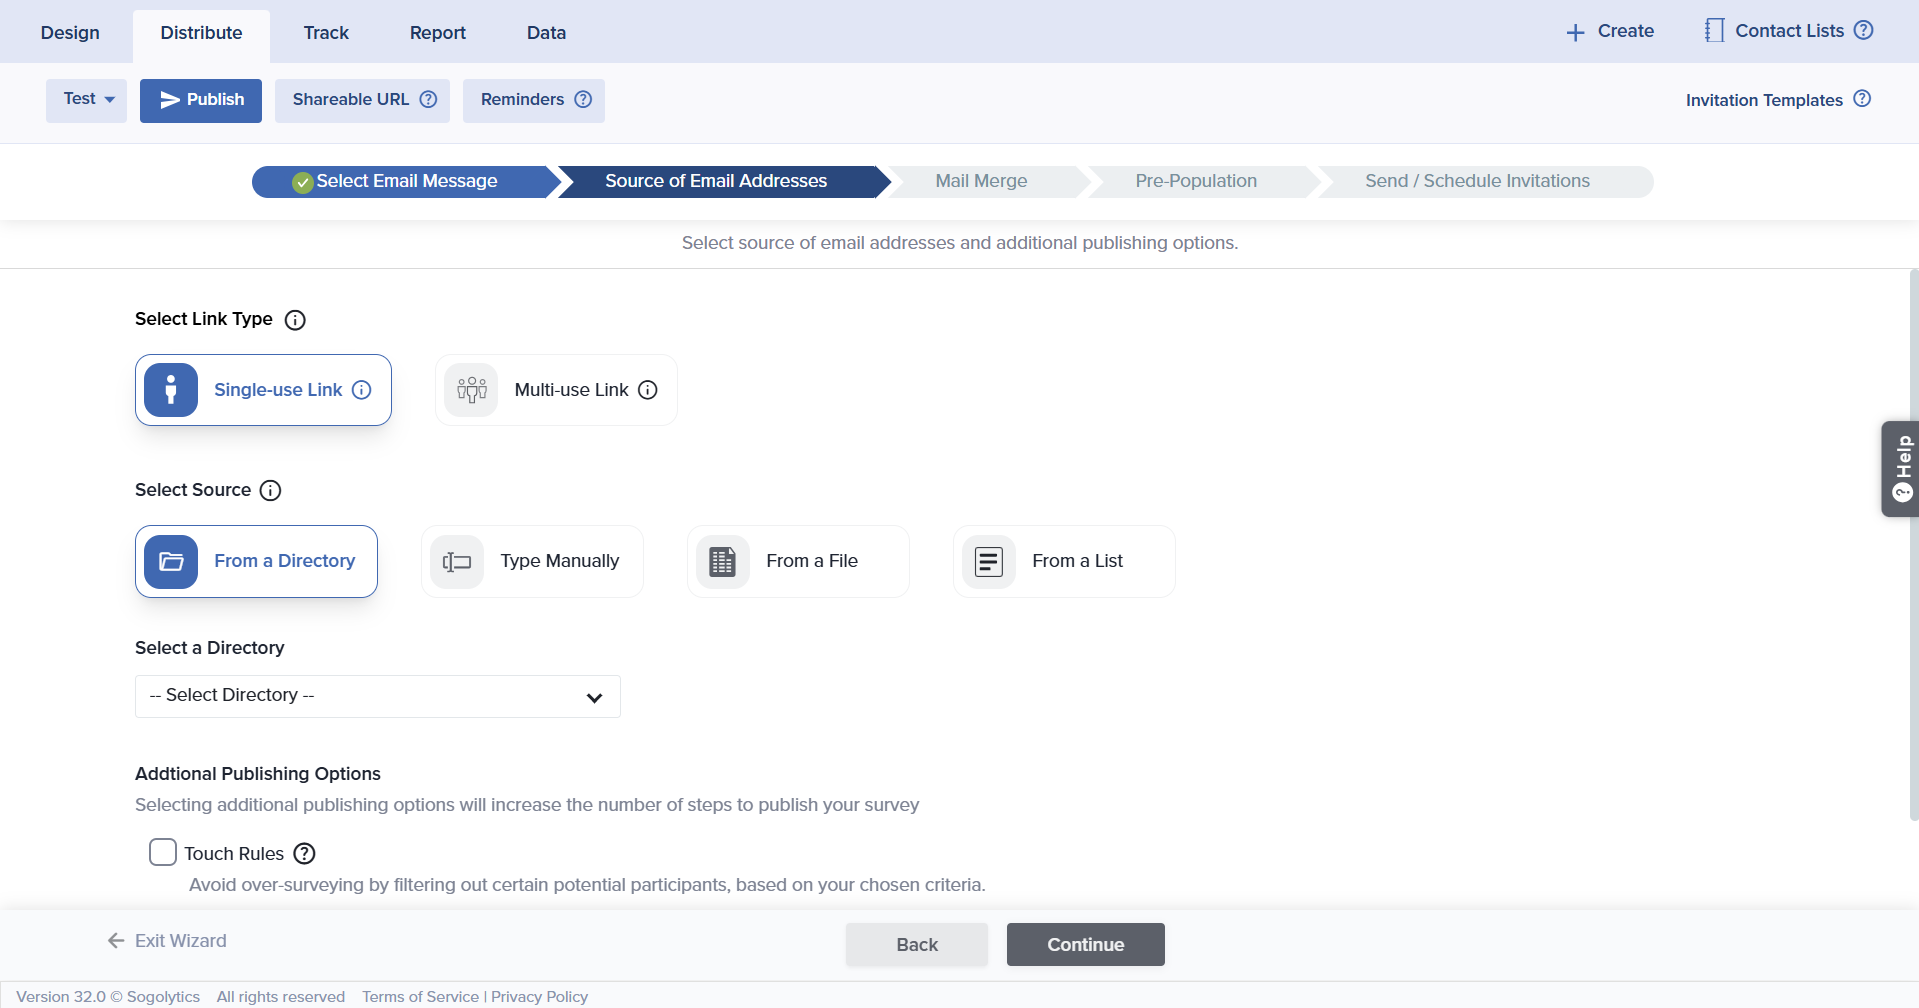
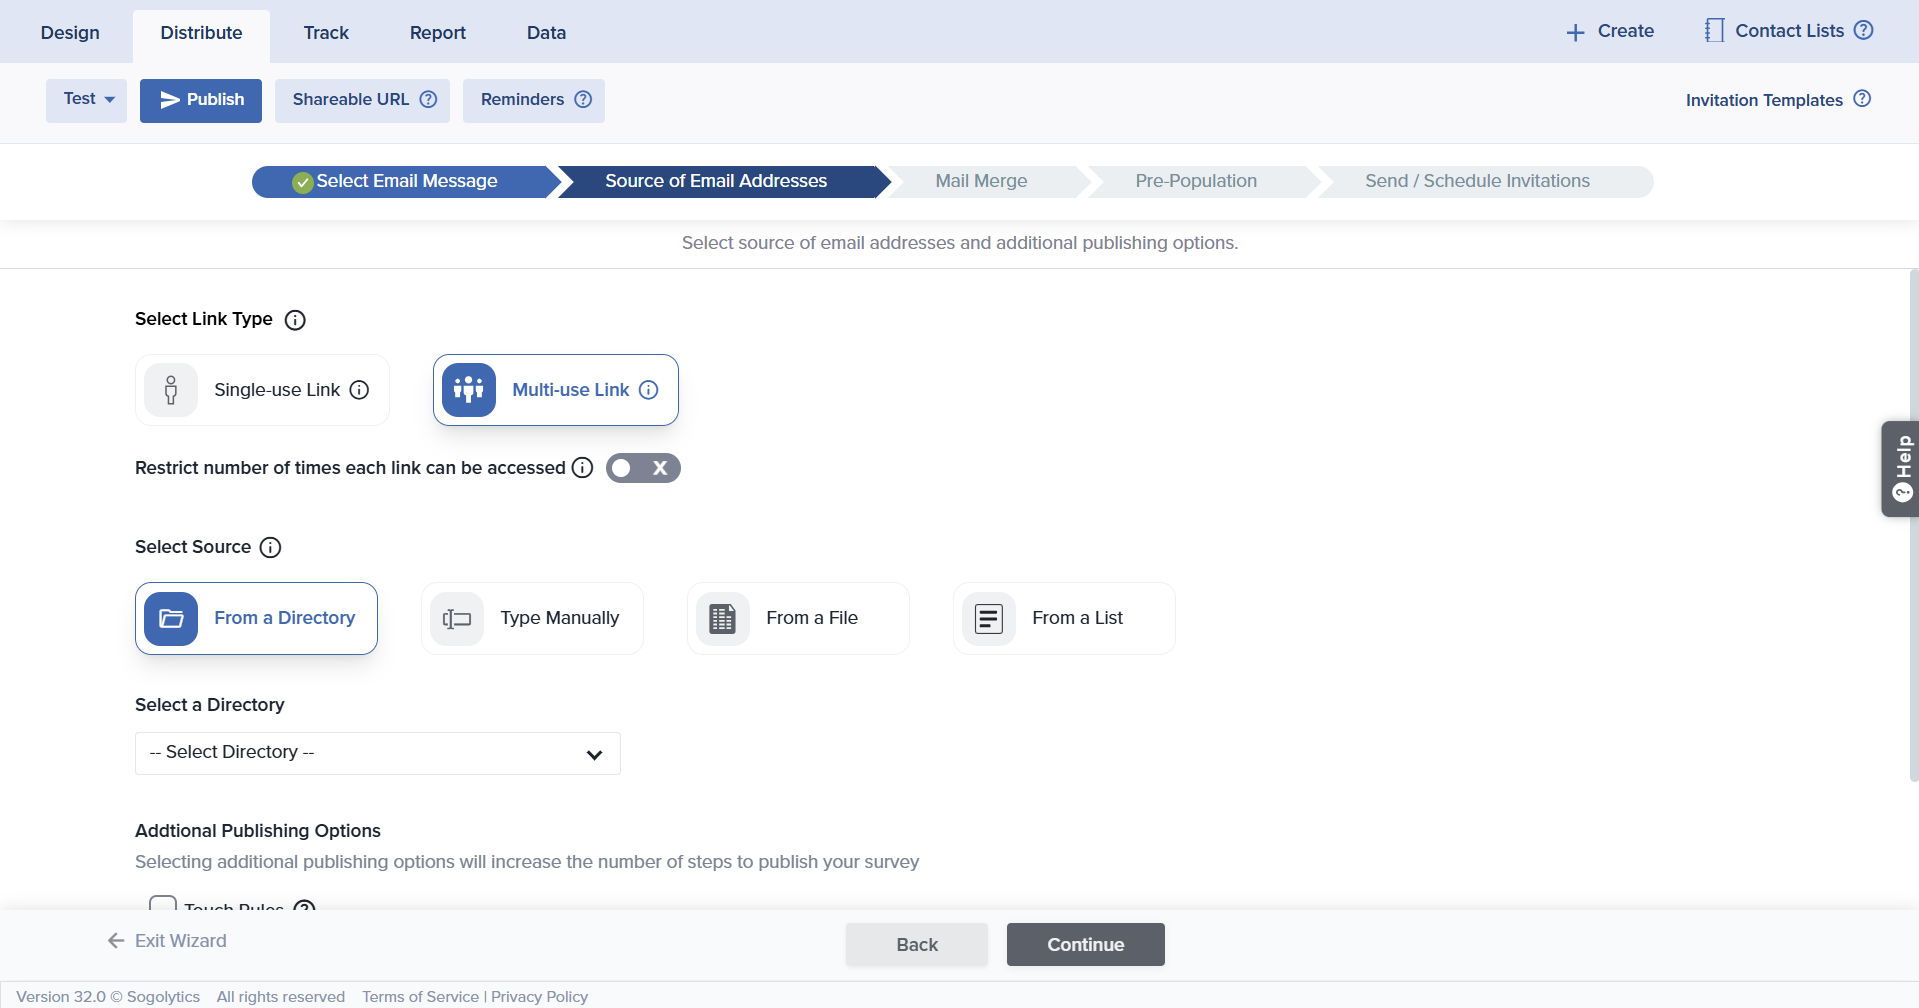
- In the ‘Source of Email Addresses’ wizard, select your preferred link type: Single-Use or Multi-Use Link.

Next, choose your preferred source from the following:- Directory This option allows you to send invitations to Contacts in an existing Directory. You may also use this option to seek feedback for a specific Activity. To learn more about sending invites using Directory, click here.
- Type Manually: Type or copy/paste email addresses directly. This option is ideal if you are sending invitations to a small set of email addresses or if you don’t have an existing file. Up to 500 addresses may be entered at once, separated by commas or line breaks.
- From a File: Upload a list of contacts in .txt, .csv, .xls, or .xlsx format. The file may not exceed 9 MB and it must include email addresses in the first column.
Read more about supported file formats. - From a List: Select a List you have built under Contact Lists. Learn how to build a Contact List.
- If you have selected File or List, you will be able to select the Sample size. When enabled, you will see the following options:
- Draw random Sample from all eligible contacts: This option allows you to select a random sample size based on Number or Percentage.
- Selected Email Addresses: This option allows you to select the sample size based on the selected Email Address or Email Domain.
- Under Additional Publishing Options, you may choose to select more advanced features:
- Touch Rules: Sogolytics’ Touch Rules makes it easy to avoid over-surveying by filtering out those who have recently participated, eliminating survey fatigue.
- Pre-populate Survey: This option will be pre-selected if the pre-population is applied on one or more questions. You may select the values to be pre-filled for these questions on this step.
- In the Mail Merge step, provide values for the mail merge variables used within the email content. If you entered email addresses manually, a text box will be shown next to each address. Otherwise, you will need to map columns from your List or file for each value.
If you are not seeing the Mail Merge step, you have likely not entered the mail merge code in the email content section. If you want to include these values in your message, return to edit your content and include these codes.
- If Pre-Population is used in your project, the distribution wizard will include a relevant step. Responses may be entered manually or by mapping columns.
Learn more about pre-populated invitations.

- Any answer mismatches or blanks can be downloaded and reviewed in the next step.

- In Send/Schedule Invitations, the approximate number of invitations to be sent/scheduled will be displayed.

The time specified when scheduling invitations is based on the time zone setting for the overall account.
- Reminder Options:
- You can choose to send reminders to non-participants at automatic intervals, with different Email Message for each.
- Choose to schedule reminders at intervals based on hours, days, weeks, or months from the original invitation date.
- Scheduled reminders are automatically cancelled if responses are submitted.
- Up to 2 reminders can be sent automatically.
- Invitation Expiration Options
- Set invitations to expire at intervals based on hours, days, weeks, or months from the original invitation.
- Use this feature when the project will remain active but the invitation should not.
- Expiration dates can be viewed and modified from Track.
If automatic reminders are scheduled for a set of invitations, the invitations cannot be expired before the reminders are sent.
- Before sending, click ‘Preview Pre-Pop’ to review Pre-Populated fields in a new window. If values are not correctly mapped, a system message will prompt you to change the mapping or proceed with the error.
- Finally, once everything is set, you can choose to send invitations immediately by selecting Send Now or schedule them by choosing Schedule for Later.
If you have chosen to use a Multi-Use Link, you’ll see the option to restrict the number of times a link is accessed.

When setting up a custom URL, Domain Authentication is required. Please see details here.
Subscribe for tips and insights to drive better decisions!