Dashboard Options
Want more from your Custom Dashboard? Thought you’d never ask! Dashboard Options enable you to modify and manage your Dashboards quickly and easily to keep the insights incoming.
Add Multiple Widgets
Want to add several widgets at once? No problem! This feature makes it easy to populate your Dashboard with a widget for each question in your survey or for selected questions or metadata.
To add multiple widgets, follow the steps below:
- Create a new Dashboard.
- Once the Dashboard is created, click the three-dot menu in the top right and select Add Multiple Widgets.

- Select the column layout for your widgets. Choose 1 Column to stack widgets vertically, or 2 Columns to place them side by side. The number of rows will be adjusted based on the number of widgets added.

- Choose the relevant project as your data source.
- Based on the selected project, you will have the option to choose questions and metadata from the Question/Metadata dropdown. Drill Down, Ranking, Signature, Numeric Allocation, and Attachment question types cannot be selected through this option

- Select the format in which the widgets should display data: Graph, Table or both. All the selected questions and metadata will be shown according to the chosen format.

- If you already have widgets on the Dashboard, use the Position option to decide where to place the new widgets—either at the top of the Dashboard before existing widgets or at the bottom.
- Next, go to Advanced Settings to define additional specifications for your widgets. Within Overall, you can customize based on the following options.
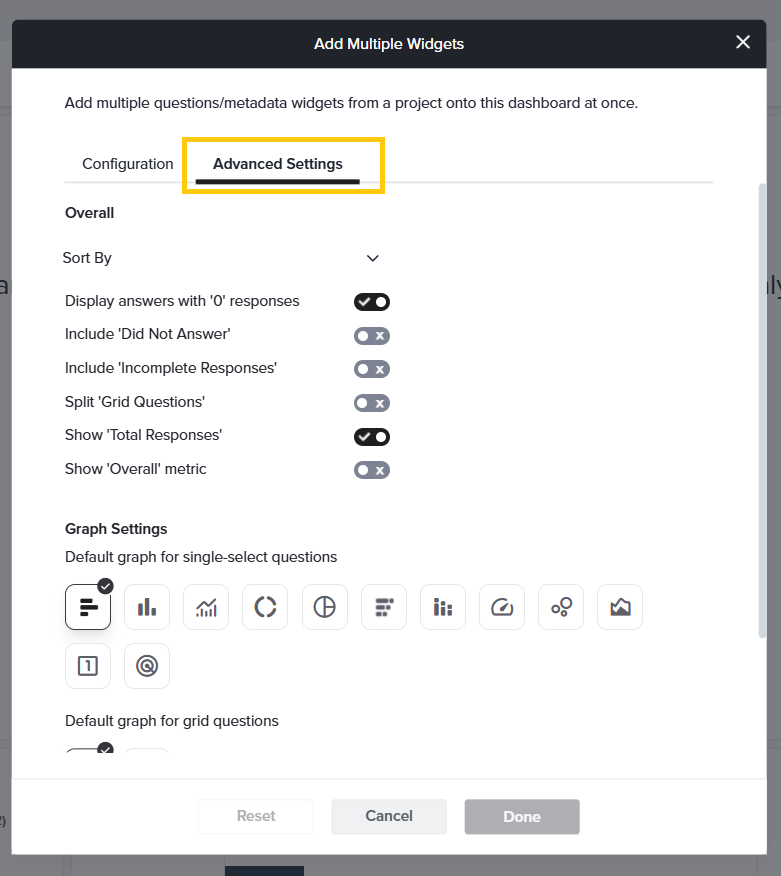
- Sort By: Sort your answer options based on the following criteria:
- In order of appearance of the question
- In alphabetical order (A to Z)
- In reverse alphabetical order (Z to A)
- From highest to lowest value
- From lowest to highest value
- Display answers with 0 responses
- Include ‘Did Not Answer’
- Include ‘Incomplete Responses’
- Split ‘Grid Questions’
- Show ‘Total Responses’
- Show ‘Overall Metric’
- Sort By: Sort your answer options based on the following criteria:
- Also under Advanced Settings, Graph Settings let you specify the graph types for single-select and grid questions. You can also select default graph color palettes here.

- Once you have customized all the settings, click Done. All selected questions will be added as widgets to the Custom Dashboard.
Duplicate
Love your Dashboard but need to make a few changes for a different audience or purpose? Save time by starting from a copy!

Widget Settings
This option will allow you to change the settings for all the widgets in the Dashboard at once. Just follow these steps:
- Click on the three-dot menu located at the top right corner of the Dashboard.
- From the Dashboard options, select Widget Settings.

- This will open the Widget Settings dialog box. Here, you can modify the Overall and the Graph Settings.
- In the Overall Settings, you can customize the following aspects of a widget:
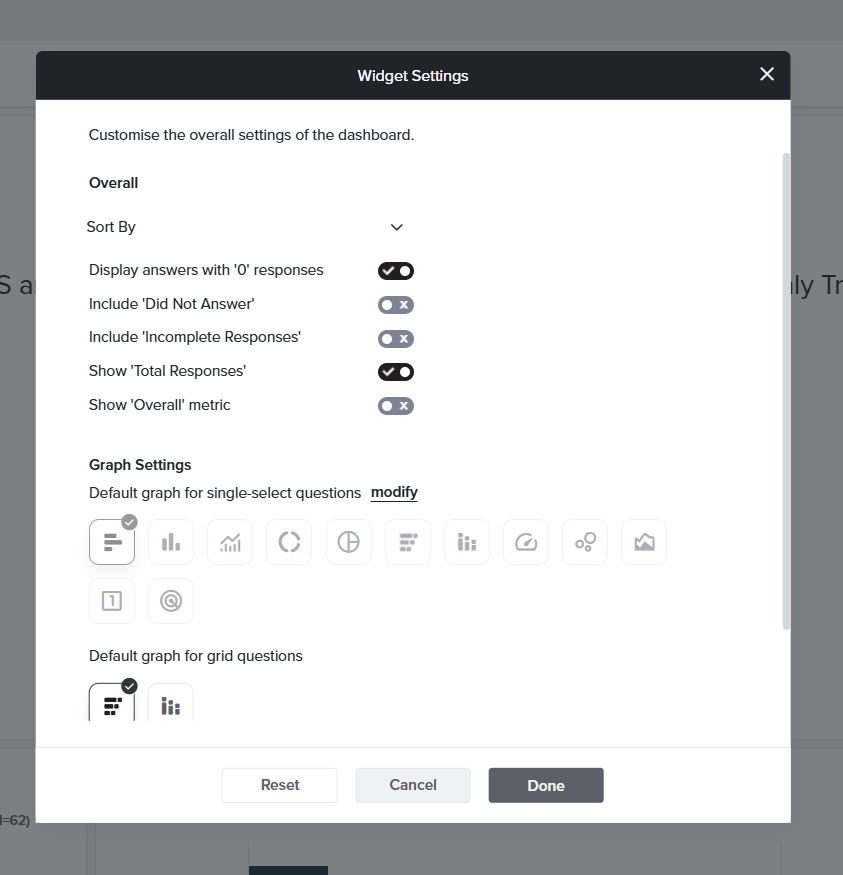
- Sort By
- In order of appearance of the question
- In alphabetical order (A to Z)
- In reverse alphabetical order (Z to A)
- From highest to lowest value
- From lowest to highest value
- Display answers with ‘0’ responses
- Include ‘Did Not Answer’
- Include ‘Incomplete Responses’
- Show ‘Total Responses’
- Show ‘Overall’ metric
- Sort By
- The Graph Settings option allows you to select the default graph type for all Single Select and Grid questions that will be added in the future. Additionally, this option enables you to choose the Default Color Palette for the graphs to be added.

Layout Settings
The Layout settings allow you to define the structure of your Dashboard. You can set the number of columns, ranging from 1 to 4. Additionally, you can use the following options to adjust the positioning of widgets:

- Widget Push: Automatically adjusts the position of widgets as you move them.
- Widget Swap: Enables swapping the positions of widgets.
- Compact – Left & Up: Displays a compact Dashboard view by aligning widgets to the left and moving them up.
Swap and Push options are not compatible; only one can be enabled at a time.
Share
This option allows you to share your dashboard via a link or email. You can also view the versions of the dashboard you have already shared. To learn more about Share, click here.
Delete
This option allows you to delete the Dashboard. Once you click on Delete, the platform will prompt you to confirm the action. If you click on Yes, Delete! the Dashboard will be permanently deleted.

Subscribe for tips and insights to drive better decisions!