There are no shortage of updates happening in the Sogolytics platform these days, and while you may not have noticed all of them yet, we can’t help but share our excitement! Here’s a quick round-up of a few favorites from the past few months (If you’re counting, releases 30.11, 30.12, and 30.13!).
Make it better
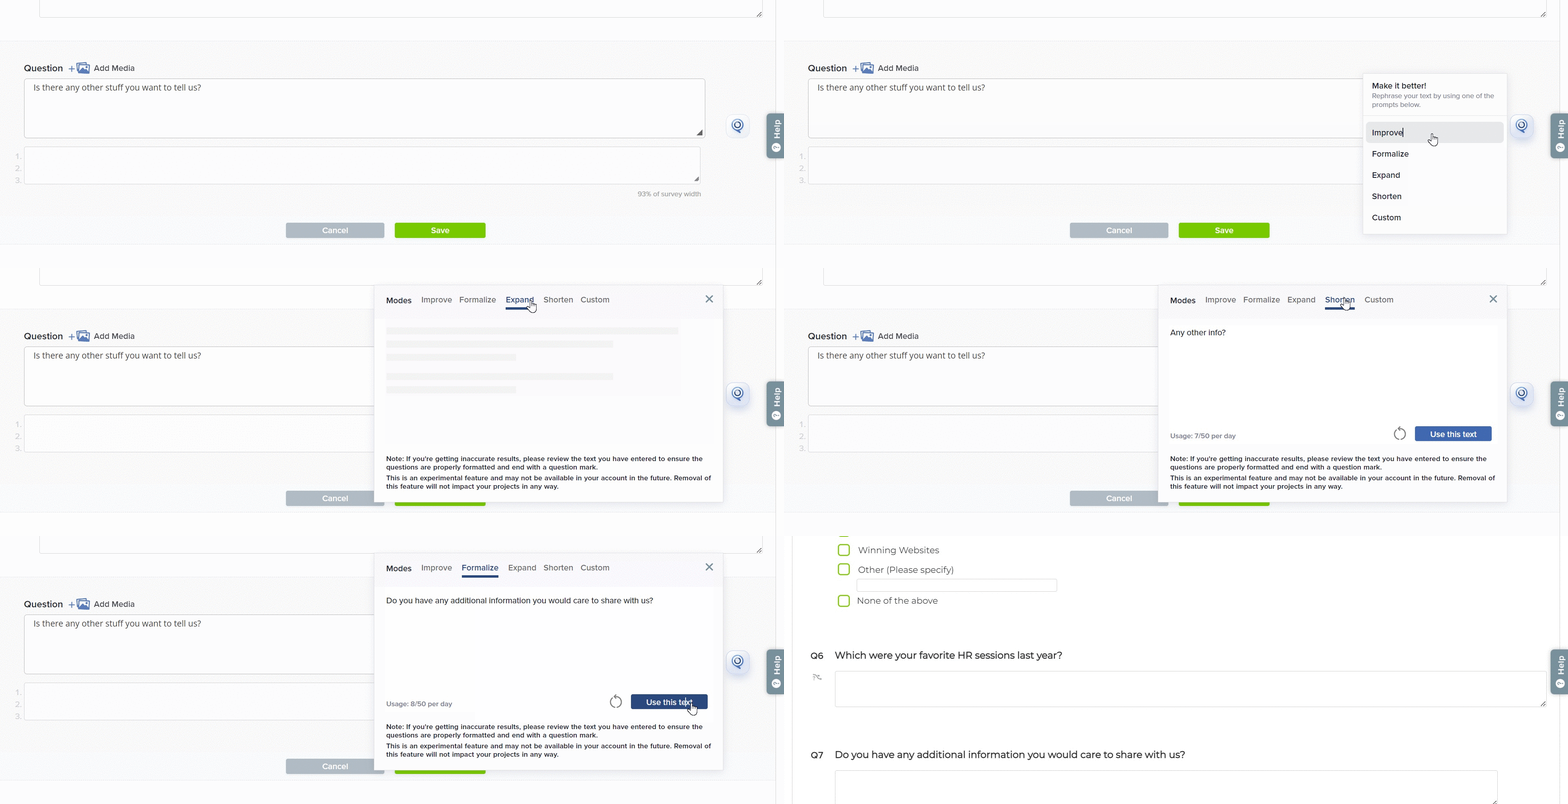
- Use of AI to help write better text
Yes, we highlighted this one when it went live (several months ago!) but we keep hearing from users who are surprised and delighted to have found this update, so we’re giving it another curtain call!
If you’ve ever wondered “Is there a better way to ask this question so that my participants will understand what I mean and deliver better results?” then now is your time: AI to the rescue! Our OpenAI-powered assistant is standing by and ready to help!
A place for everything
- Improvements to folder selection when creating a project
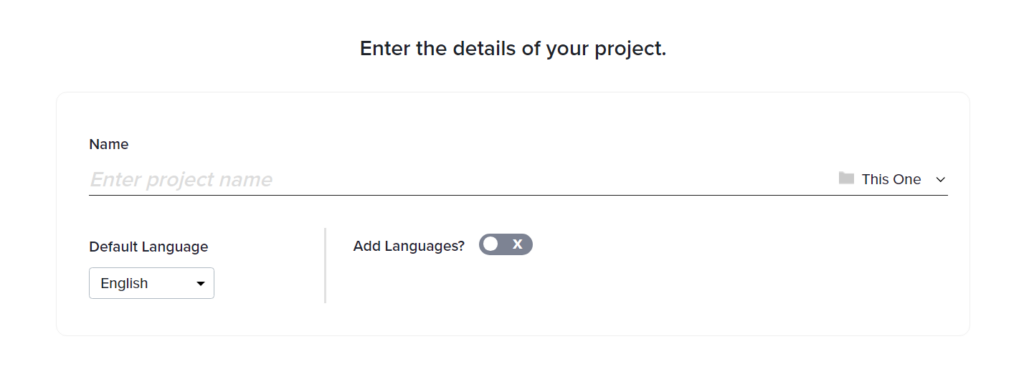
The Main folder of your account is great, but it’s not always the right place to put everything. You’ve created your own project folders, right? If so, the first time you save a project, you’ll be prompted to choose the right project folder — like “This One” rather than just defaulting to the Main folder every time. The next time you create a new project, “This One” will show up as a the default, making it easier to stay organized from the start.
Template top-up
- Sub-user permissions for specific Email Templates
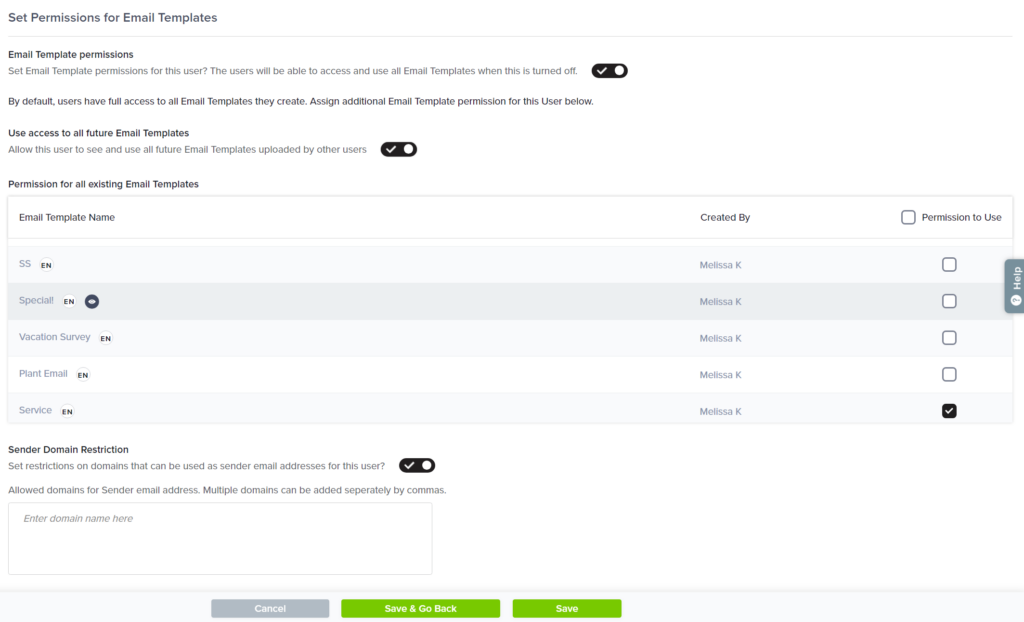
Speaking of staying organized, account admins now have more power over how Email Templates work. Rather than controlling access only at the Distribute module or project level, you can now also pick and choose which sub-users have access to which specific Email Templates. This is especially helpful when you have lots of different users in your account and lots of different invitations and reminders.
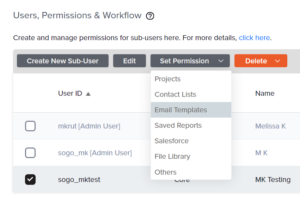
But wait — there’s more! You may choose to grant access to all or some current Email Templates or future Email Templates, and you may choose to grant permissions to send from only specific domains. This is especially helpful to ensure appropriate branding controls in organizations that operate under multiple names or on multiple projects.
We like to merge it merge it 😉
- Use Mail Merge for dynamic updates to sender name, sender email, and reply-to fields
Sometimes, it makes sense for all of your email invitations to come from the same sender, use the same sender email address, and include the same reply-to email. Sometimes, it doesn’t.
Sure, you can send separate email invitations to separate groups of recipients. That gets the job done, but it’s… a job.
If you’ve been waiting for the moment when that job becomes a whole lot easier, this is your moment. Available in Enterprise accounts, this feature allows users to utilize Mail Merge to push different values into the sender name, sender email, and reply-to fields — all within the same batch of email invitations. Bam!
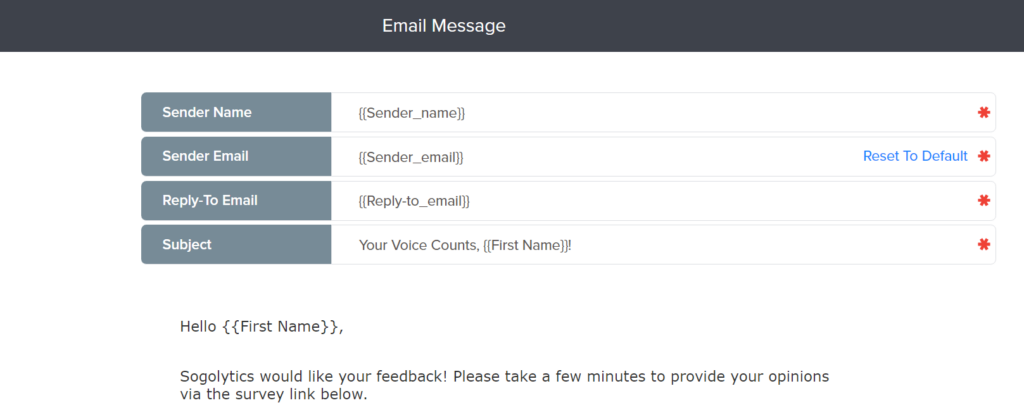
If you’ve not been waiting for this moment and wondering why anyone would want to do something like that, consider these scenarios.
- Sender Name: Your clients/students/parents are more likely to open email invitations that appear to come from their very own account managers/teachers/school principals.
- Sender Email: Recipients may be more likely to have added known contacts to safe lists, which means that using these differentiated addresses can improve the chances that each invitation will end up in the right part of the recipient’s inbox.
- Reply-to Email: Even in cases where it seems more appropriate to use a common sender name and/or email address (CEO, ceo@), that person/address might not be the best for follow-up questions or concerns. Again, an account manager, a product-specific support team, or some other differentiated address may be a more appropriate destination for replies.
Tag, you’re — no, you’re it!
- Improvements to choosing CX response Tags
If you’re a SogoCX user, you already know how amazing Tags are. Not only do they help you build an amazing Dashboard by bringing together data from multiple projects, but they can also help you map beautiful Customer Journeys to better understand the experiences of different customers, those at different locations, those who use different products… but let’s focus on what’s new!
Response-level Tags, specifically, are those Tags applied to answer options that make it possible to filter and compare results. First, you could add these Tags manually to the right answer options. Then, you could auto-map Tags to matching answer sets. Now, you can choose which questions these Tags should be applied to in order to make the most of your reporting. Sure, all metrics and drivers are great, but only those relevant to these specific Tags benefit from the match-up.
- The survey below is asking for feedback from a customer opening a new account. The name of the employee who helped them is pre-populated and hidden in Question 1.
- To add a Tag to each employee’s name, auto-map to the custom category.
- Then, choose which question(s) should be associated with the employee specifically. Here, Question 5 is the only one focused on actually opening the account, so that’s the only one that gets the employee name Tag.
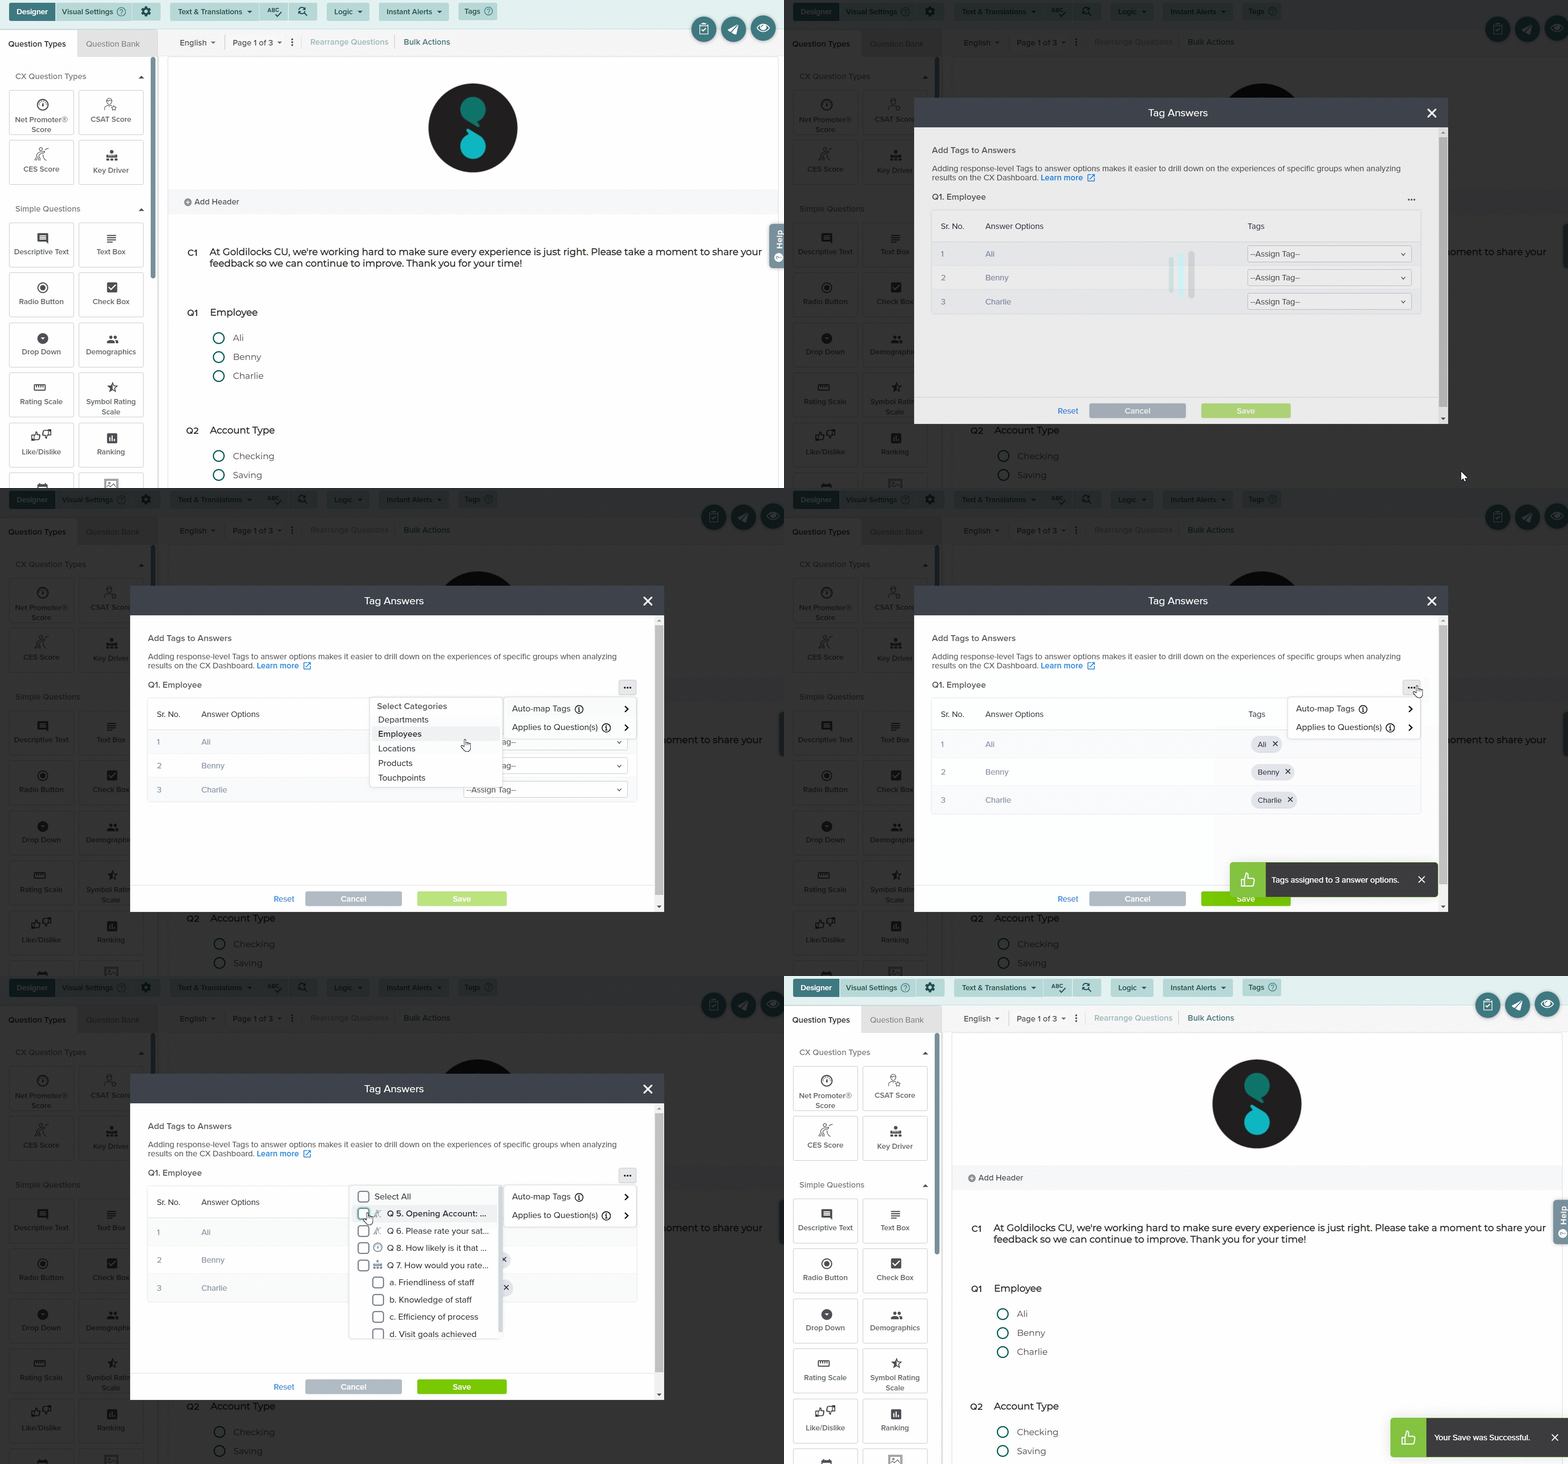
Again, this one’s specific to CX projects. If you don’t already have our customer experience solution, you can learn more here.
There’s a lot more happening backstage these days, too, so stay tuned!
Want to catch up? Check out our release highlights series or book a training call to walk through the latest. Also, remember that options vary by account type, so log in to see for yourself or drop a note to our support team with any questions.


